Are you looking for extra income?
I started a blog/website to test if a regular stay-at-home mom could make money online “blogging.”
I put blogging in quotes because blogging is totally different than what I used to think about it!
It now provides for our family, has allowed for us to travel, take time off whenever we need and enjoy our kids and life more!
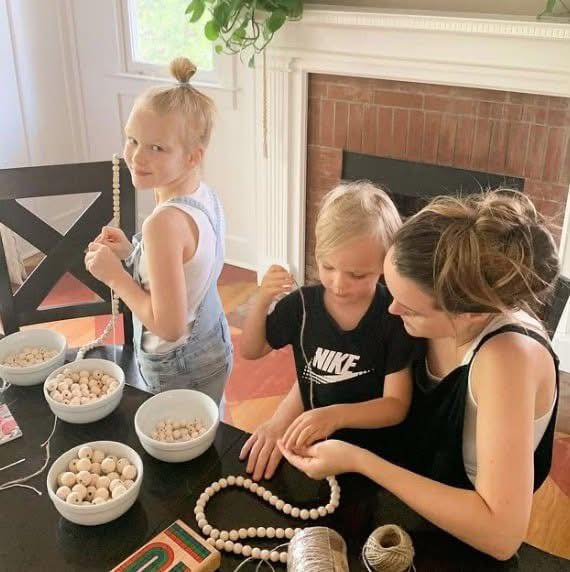
If you’ve been thinking about starting a blog you should do it today! Blogging is an awesome way to make extra income working part-time around your kid’s schedules.
I make $9,000+ a month blogging PART-TIME.
I’ll walk you through everything step-by-step.
You don’t have to be tech savvy (I’m not either!). It’s really not that hard, if you know what buttons to click!
How to Start a Blog Step-by Step (No tech knowledge required)
1. Click here to start your blog.
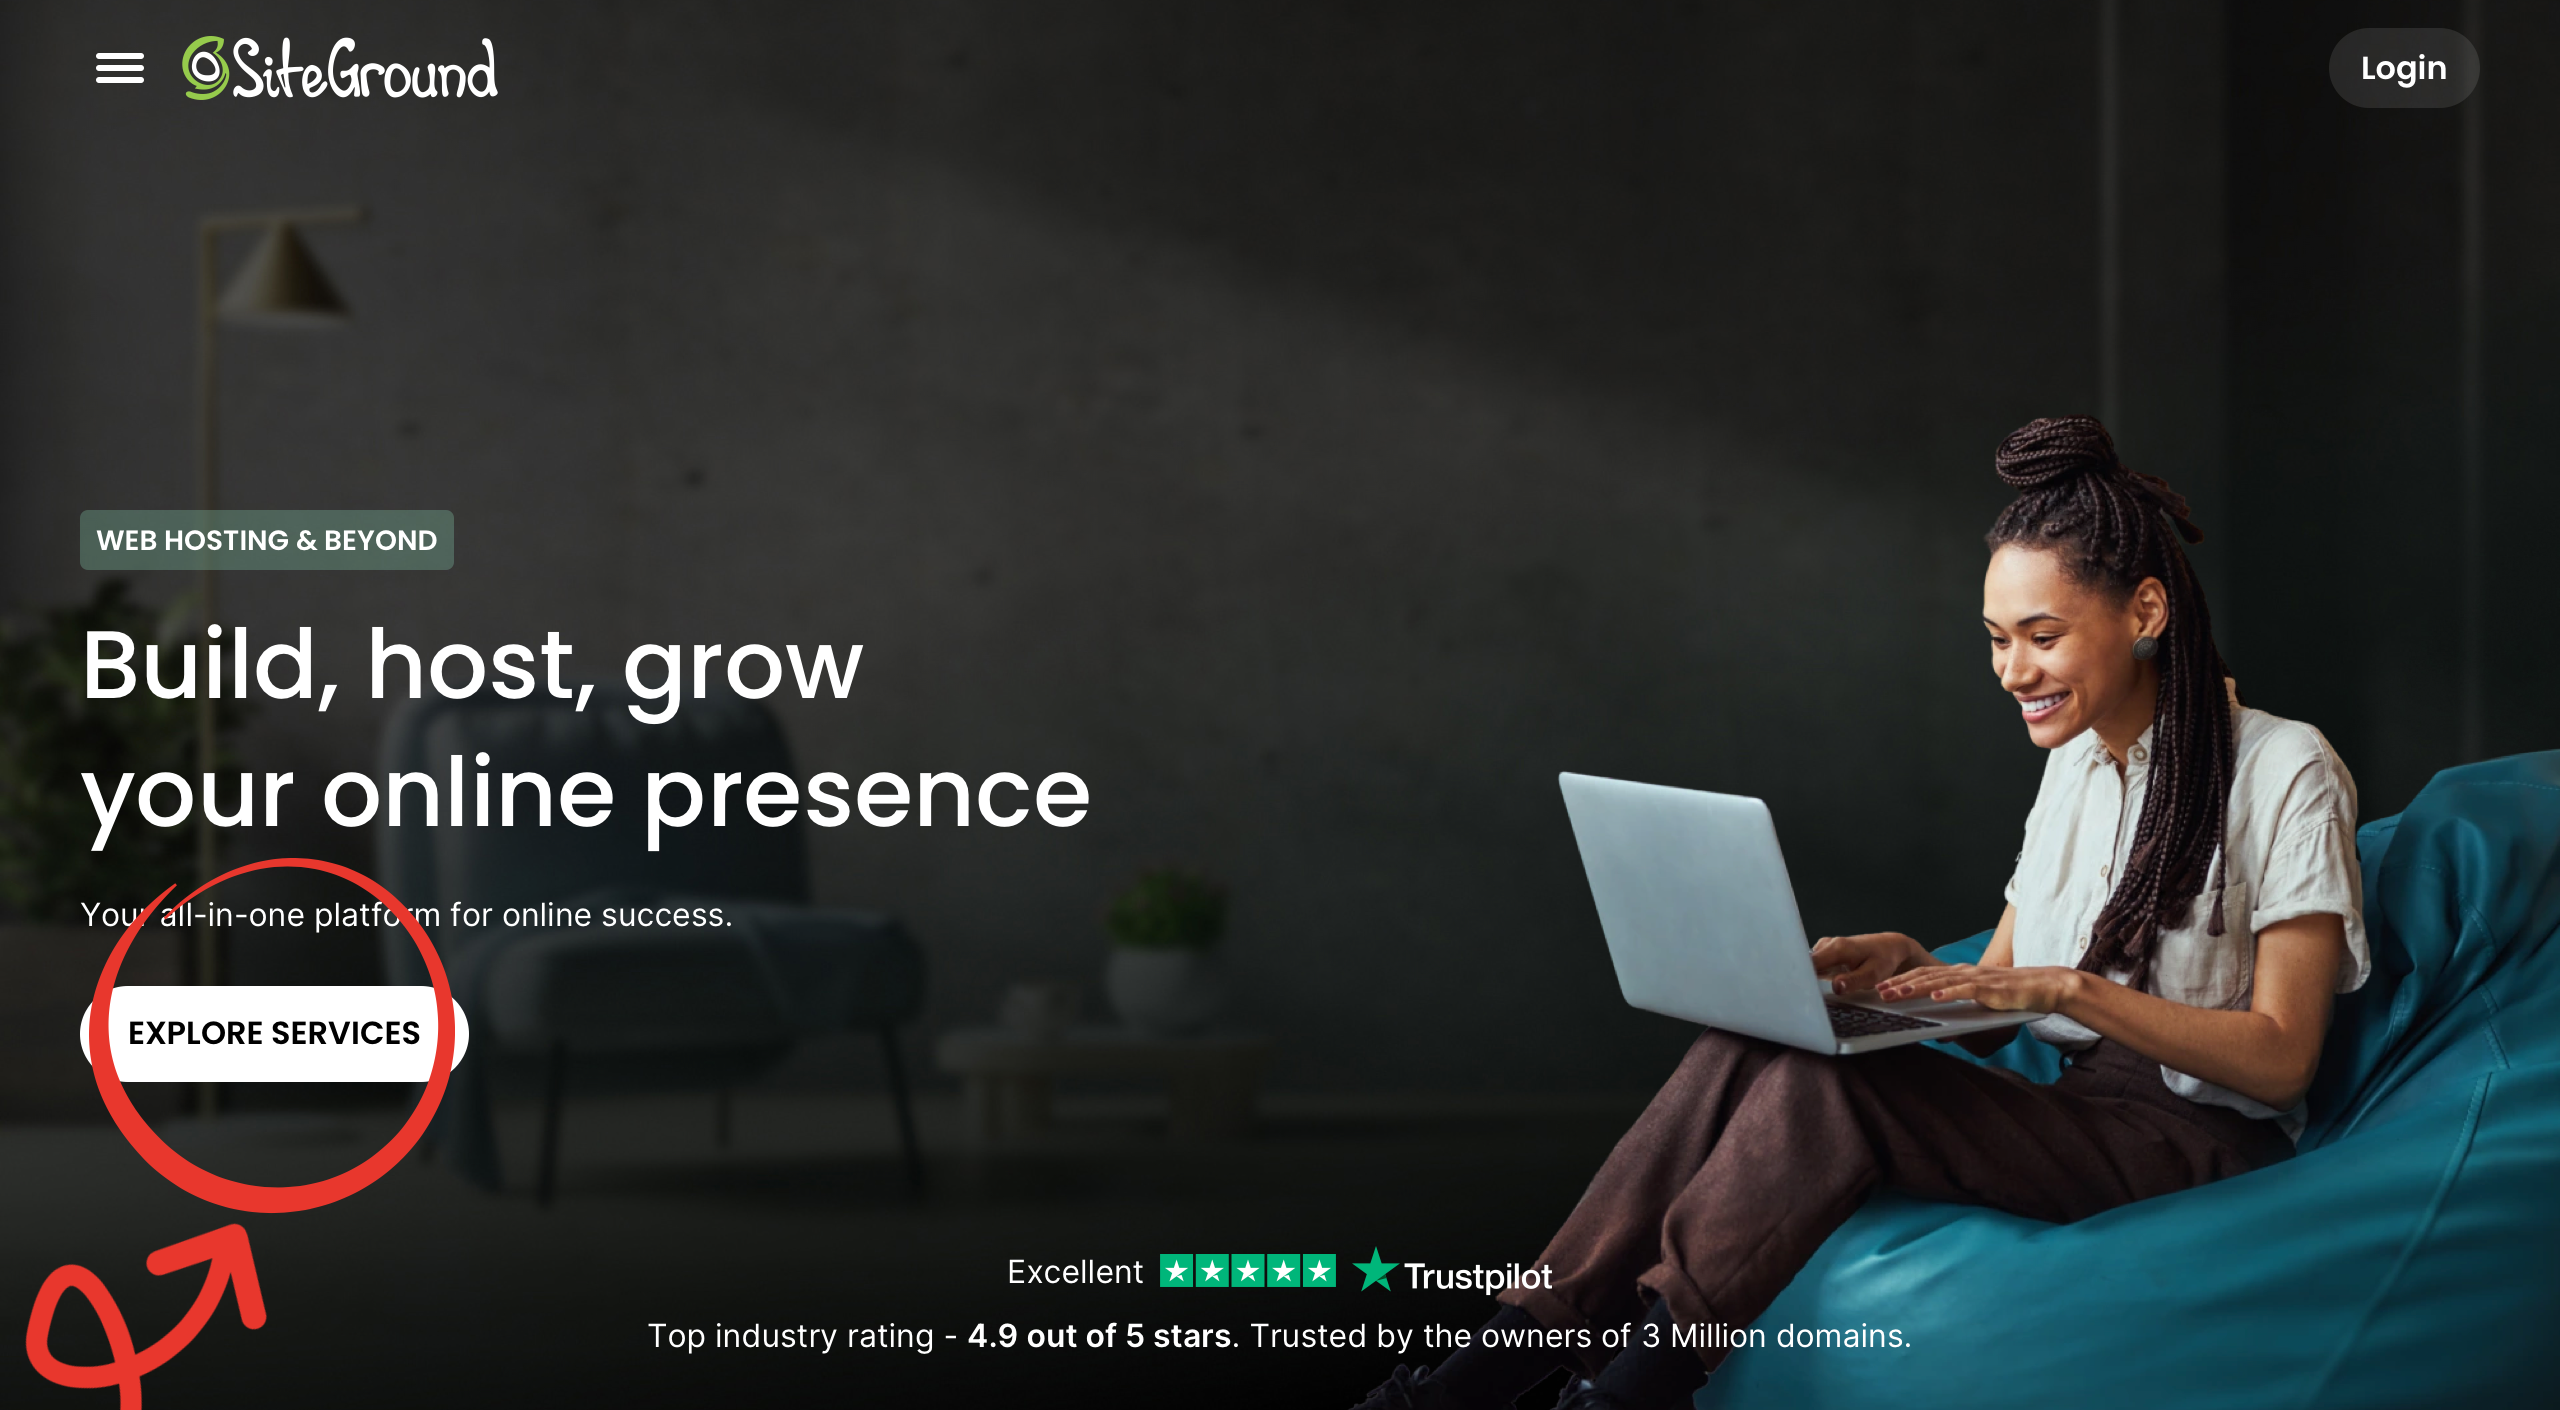
If I was starting my blog today, SiteGround is where I would start my blog/website. You can think of SiteGround like renting a little plot of internet land for a really low startup cost. You can start a blog for as little as $2.99 a month. When you consider the kind of extra side income you can make (I make $9000+ a month blogging part-time, to give you an idea), $2.99 a month is one of the most affordable side business you could start!
Note: I would recommend steering clear of starting a blog on a free site, as it won’t have all the features you will need and it will be much harder to make money.
2. Next, click the White “Explore Services” button.
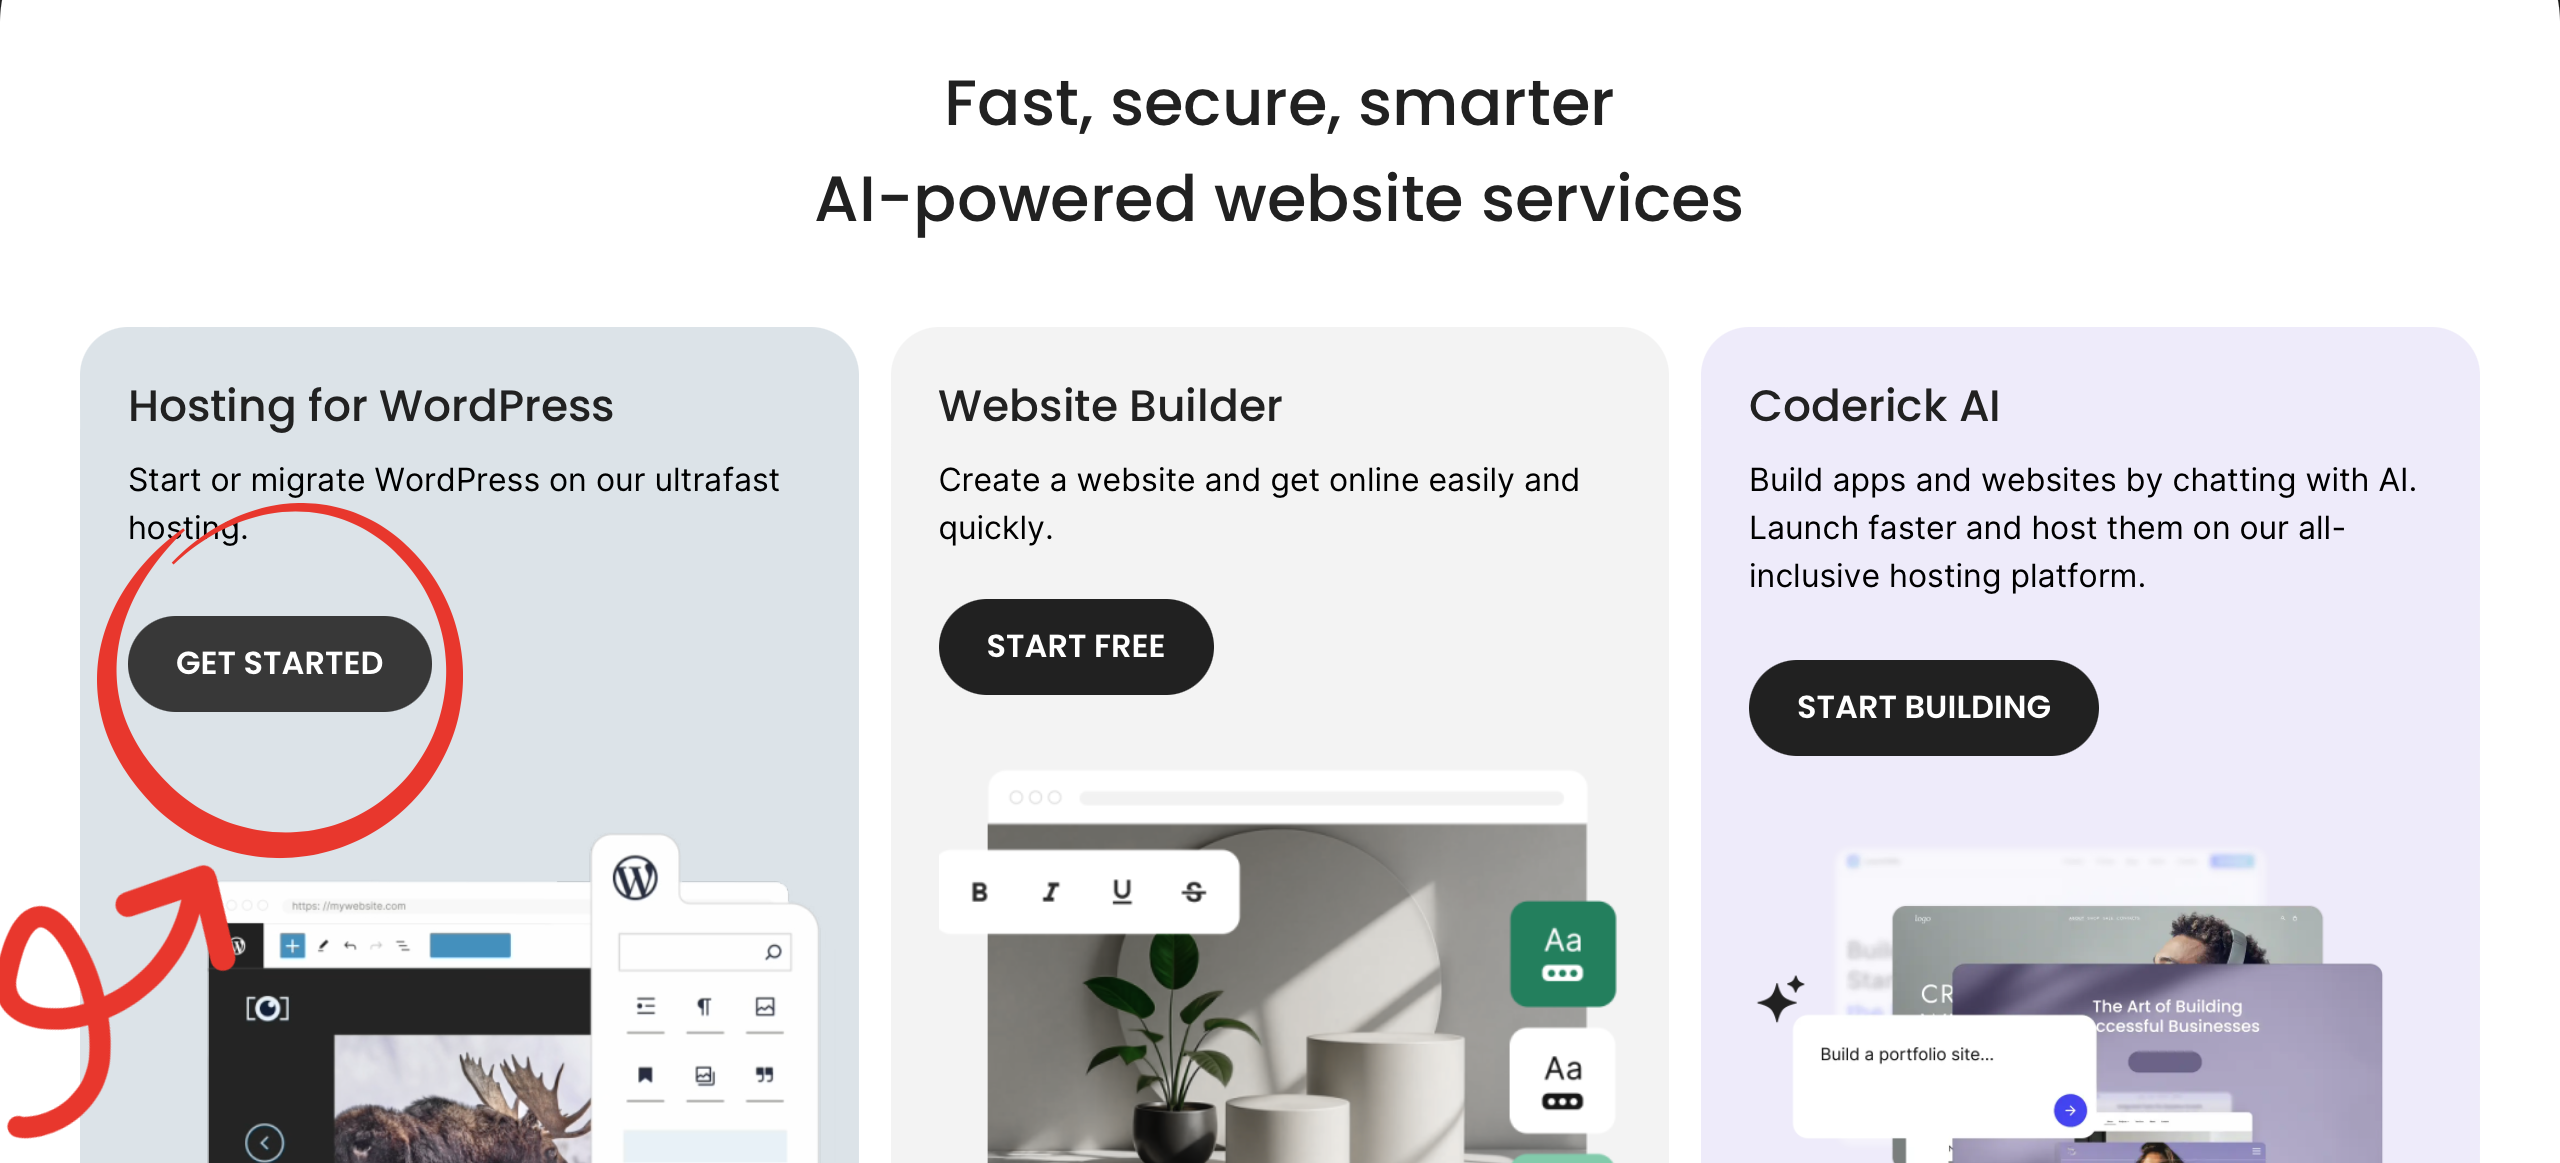
3. Next, click “Get Started” under Hosting for WordPress.
WordPress is the industry standard for blogging. When you start your blog on SiteGround, you’ll get WordPress for free. WordPress is where you will write your blog posts, design your blog, etc!
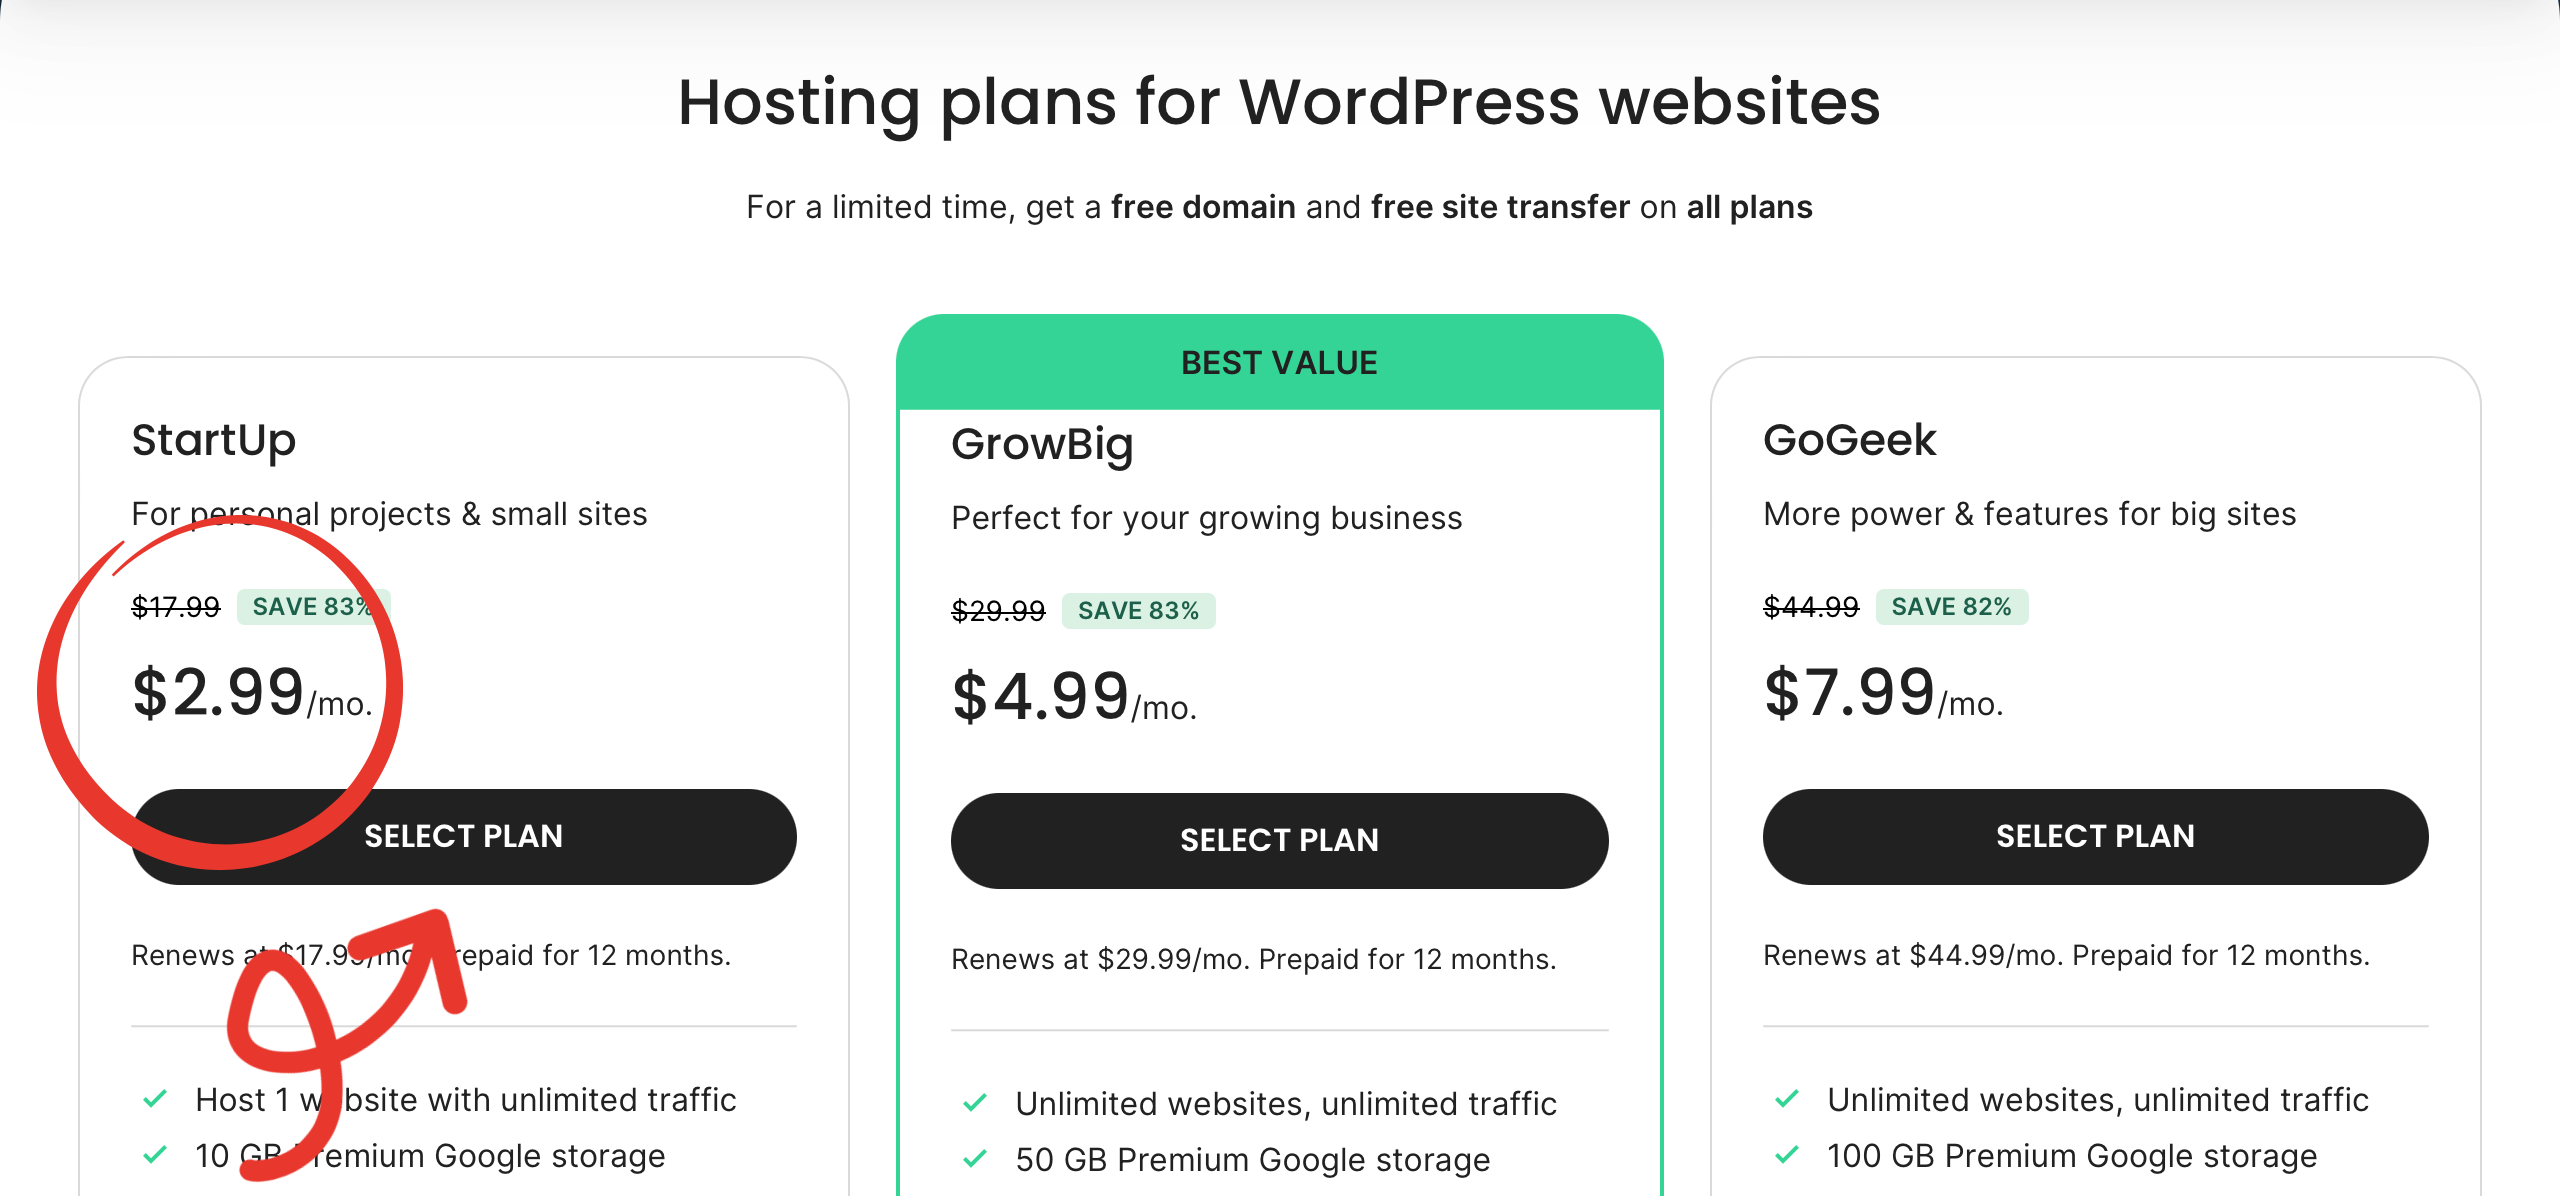
4. Then, click “View Plans.”
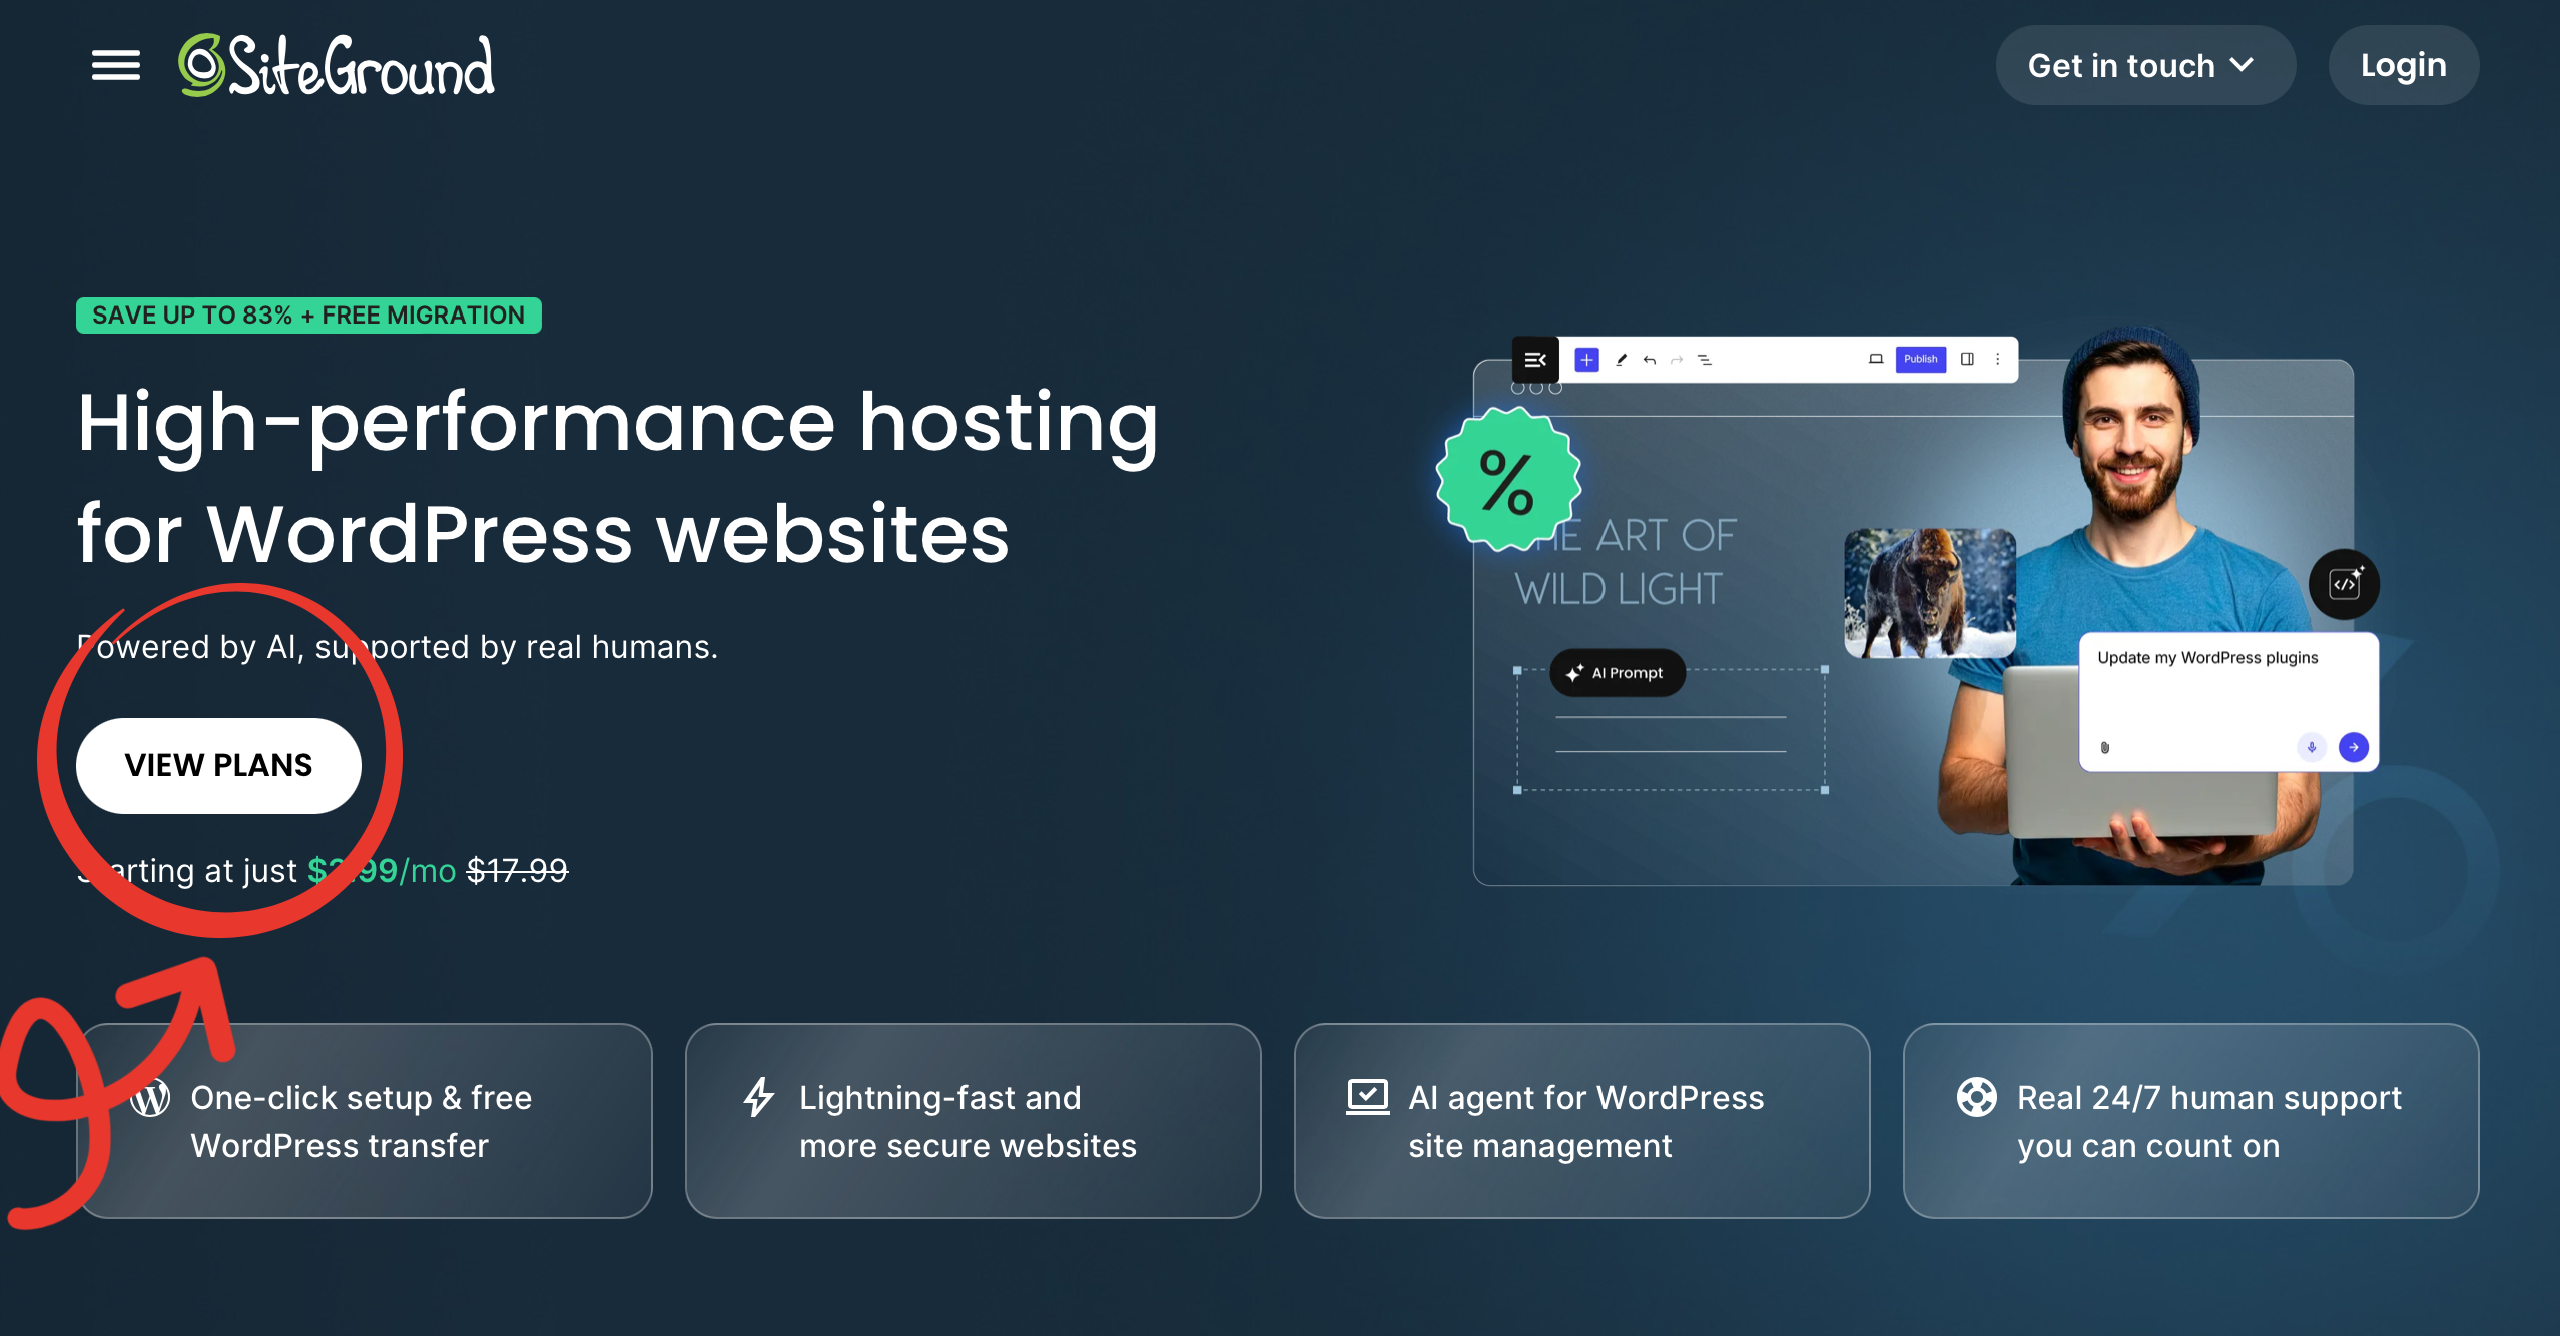
5. The goods news is the StartUp plan is all you need—click “Select Plan” under the $2.99/mo option. SiteGround does have you pay for 12 months upfront but you get the discounted price and a free domain! And then you’re all set for your entire first year of blogging!
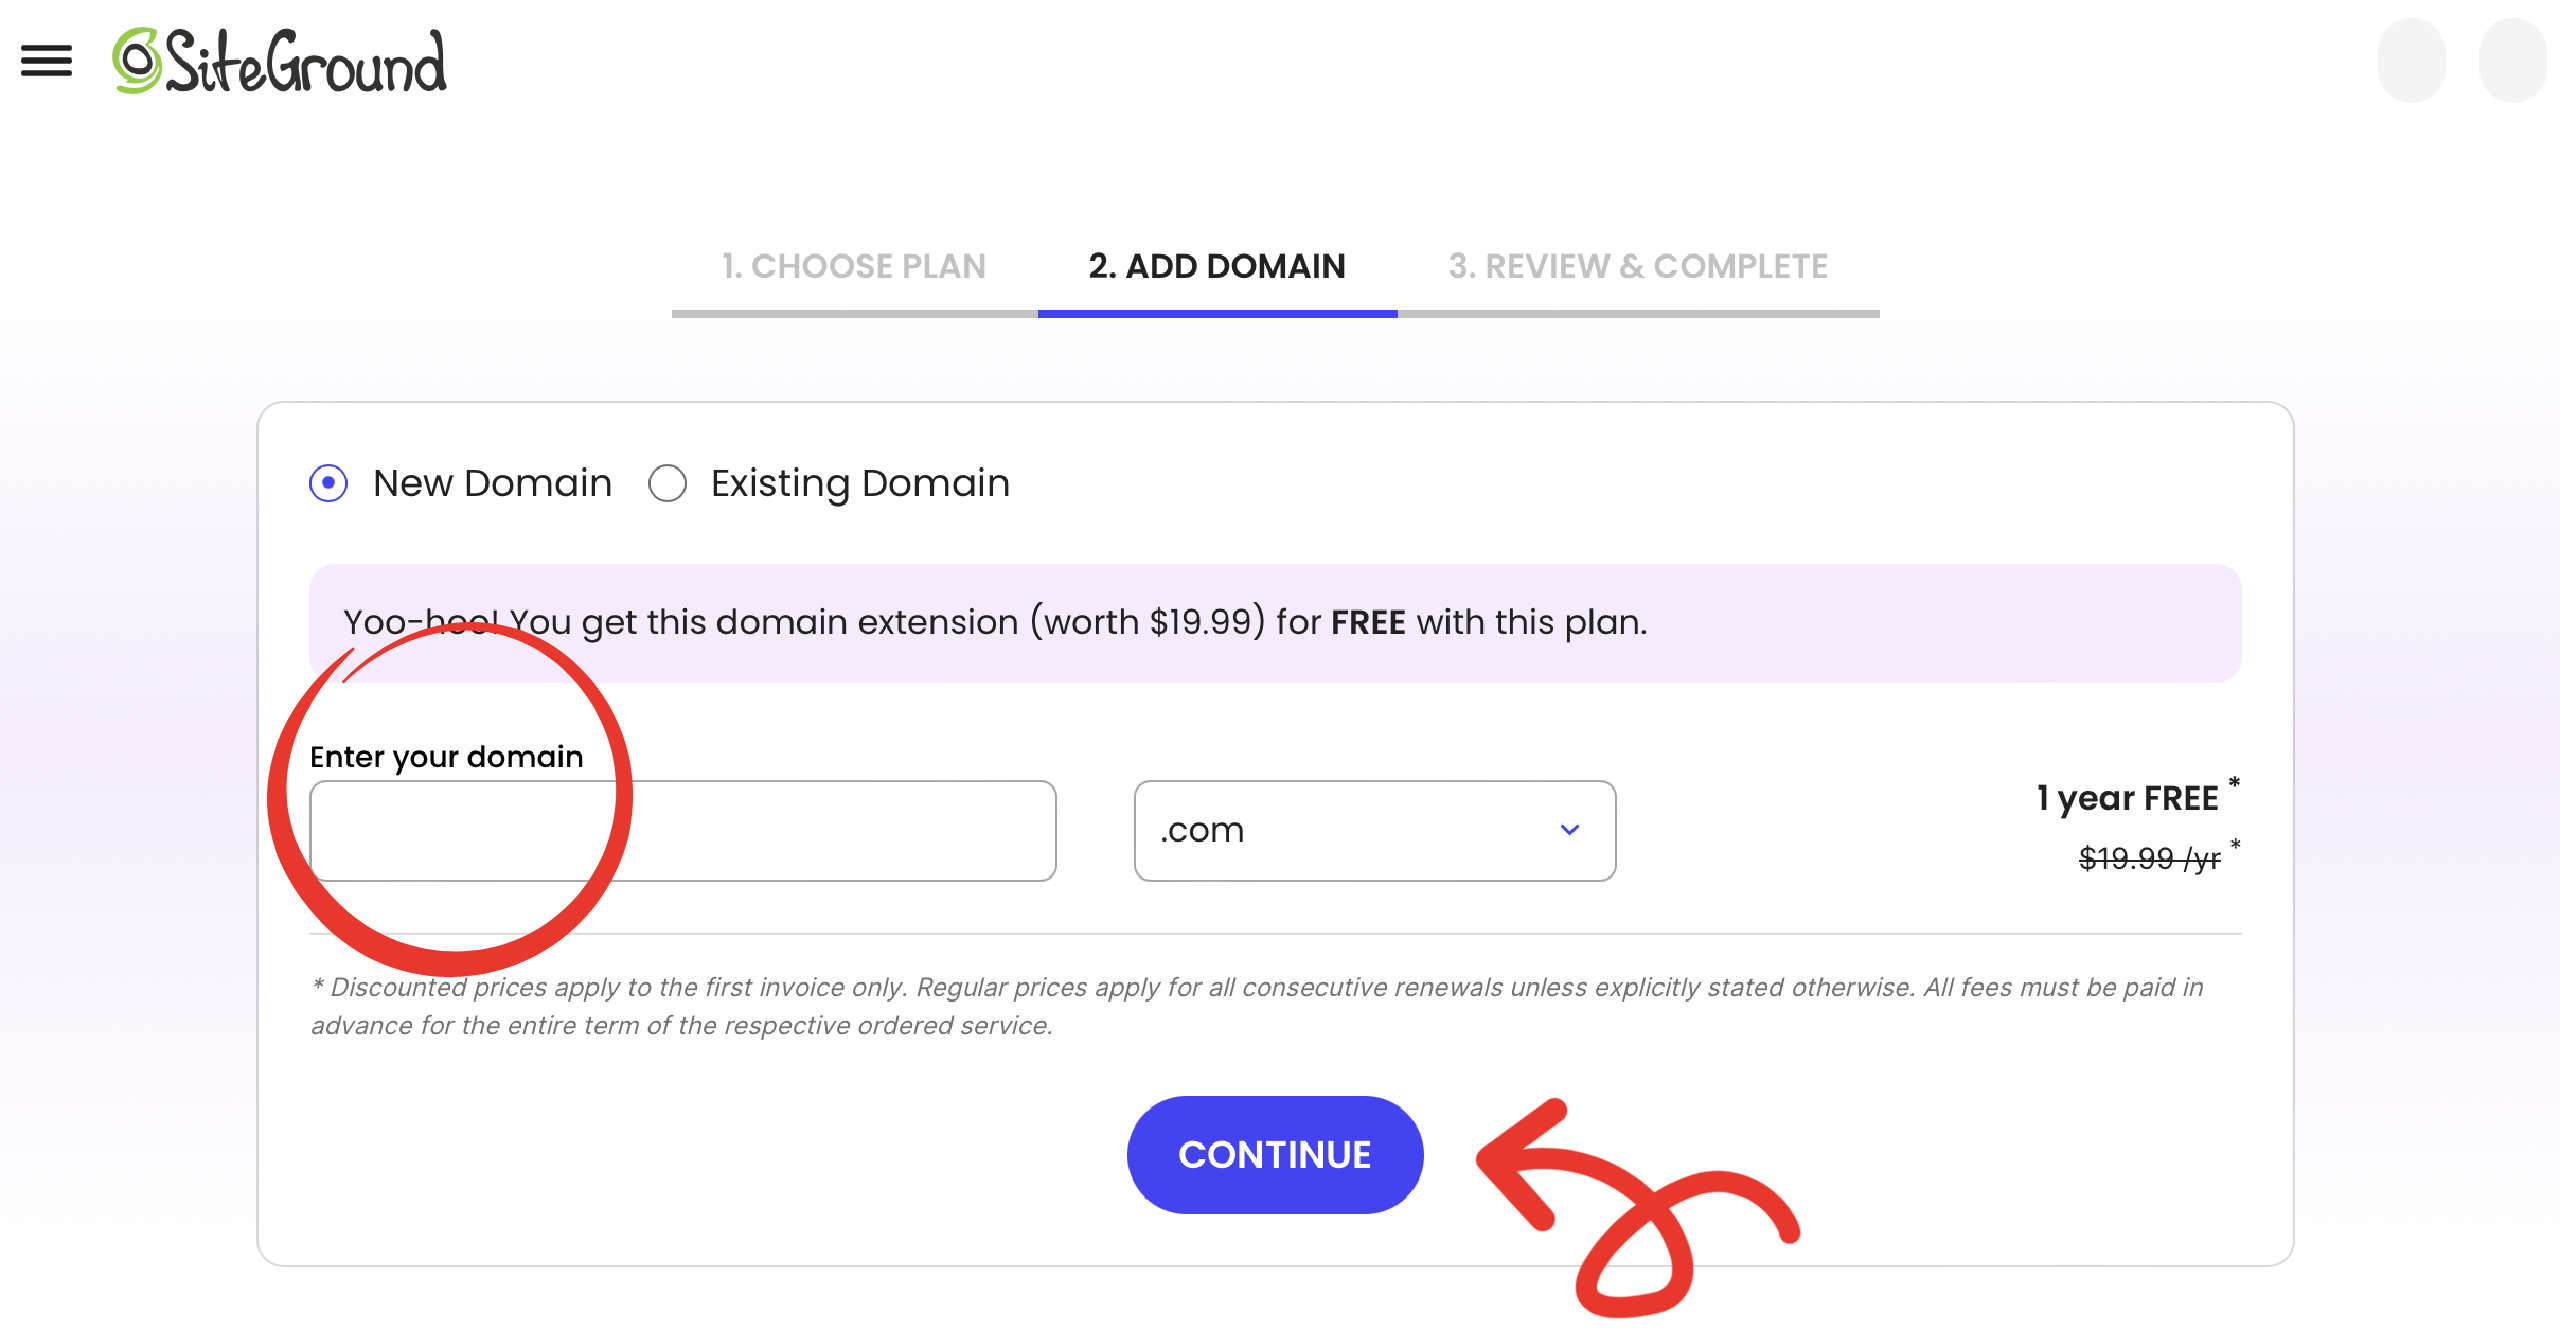
6. This next step is the fun part, where you get to decide your blog name!
Try your name idea under “Enter your domain” and then click Continue.
Your domain is your website address and it’s also your blog name (my domain is therealisticmama.com).
The first name you try might not be available, it wasn’t for me either! Just keep brainstorming names, I know you’ll come up with something awesome! Don’t overthink it too much, honestly your name matters much less than you probably think. What matters most is the quality of the blog posts that you create.
I recommend sticking with .com if possible.
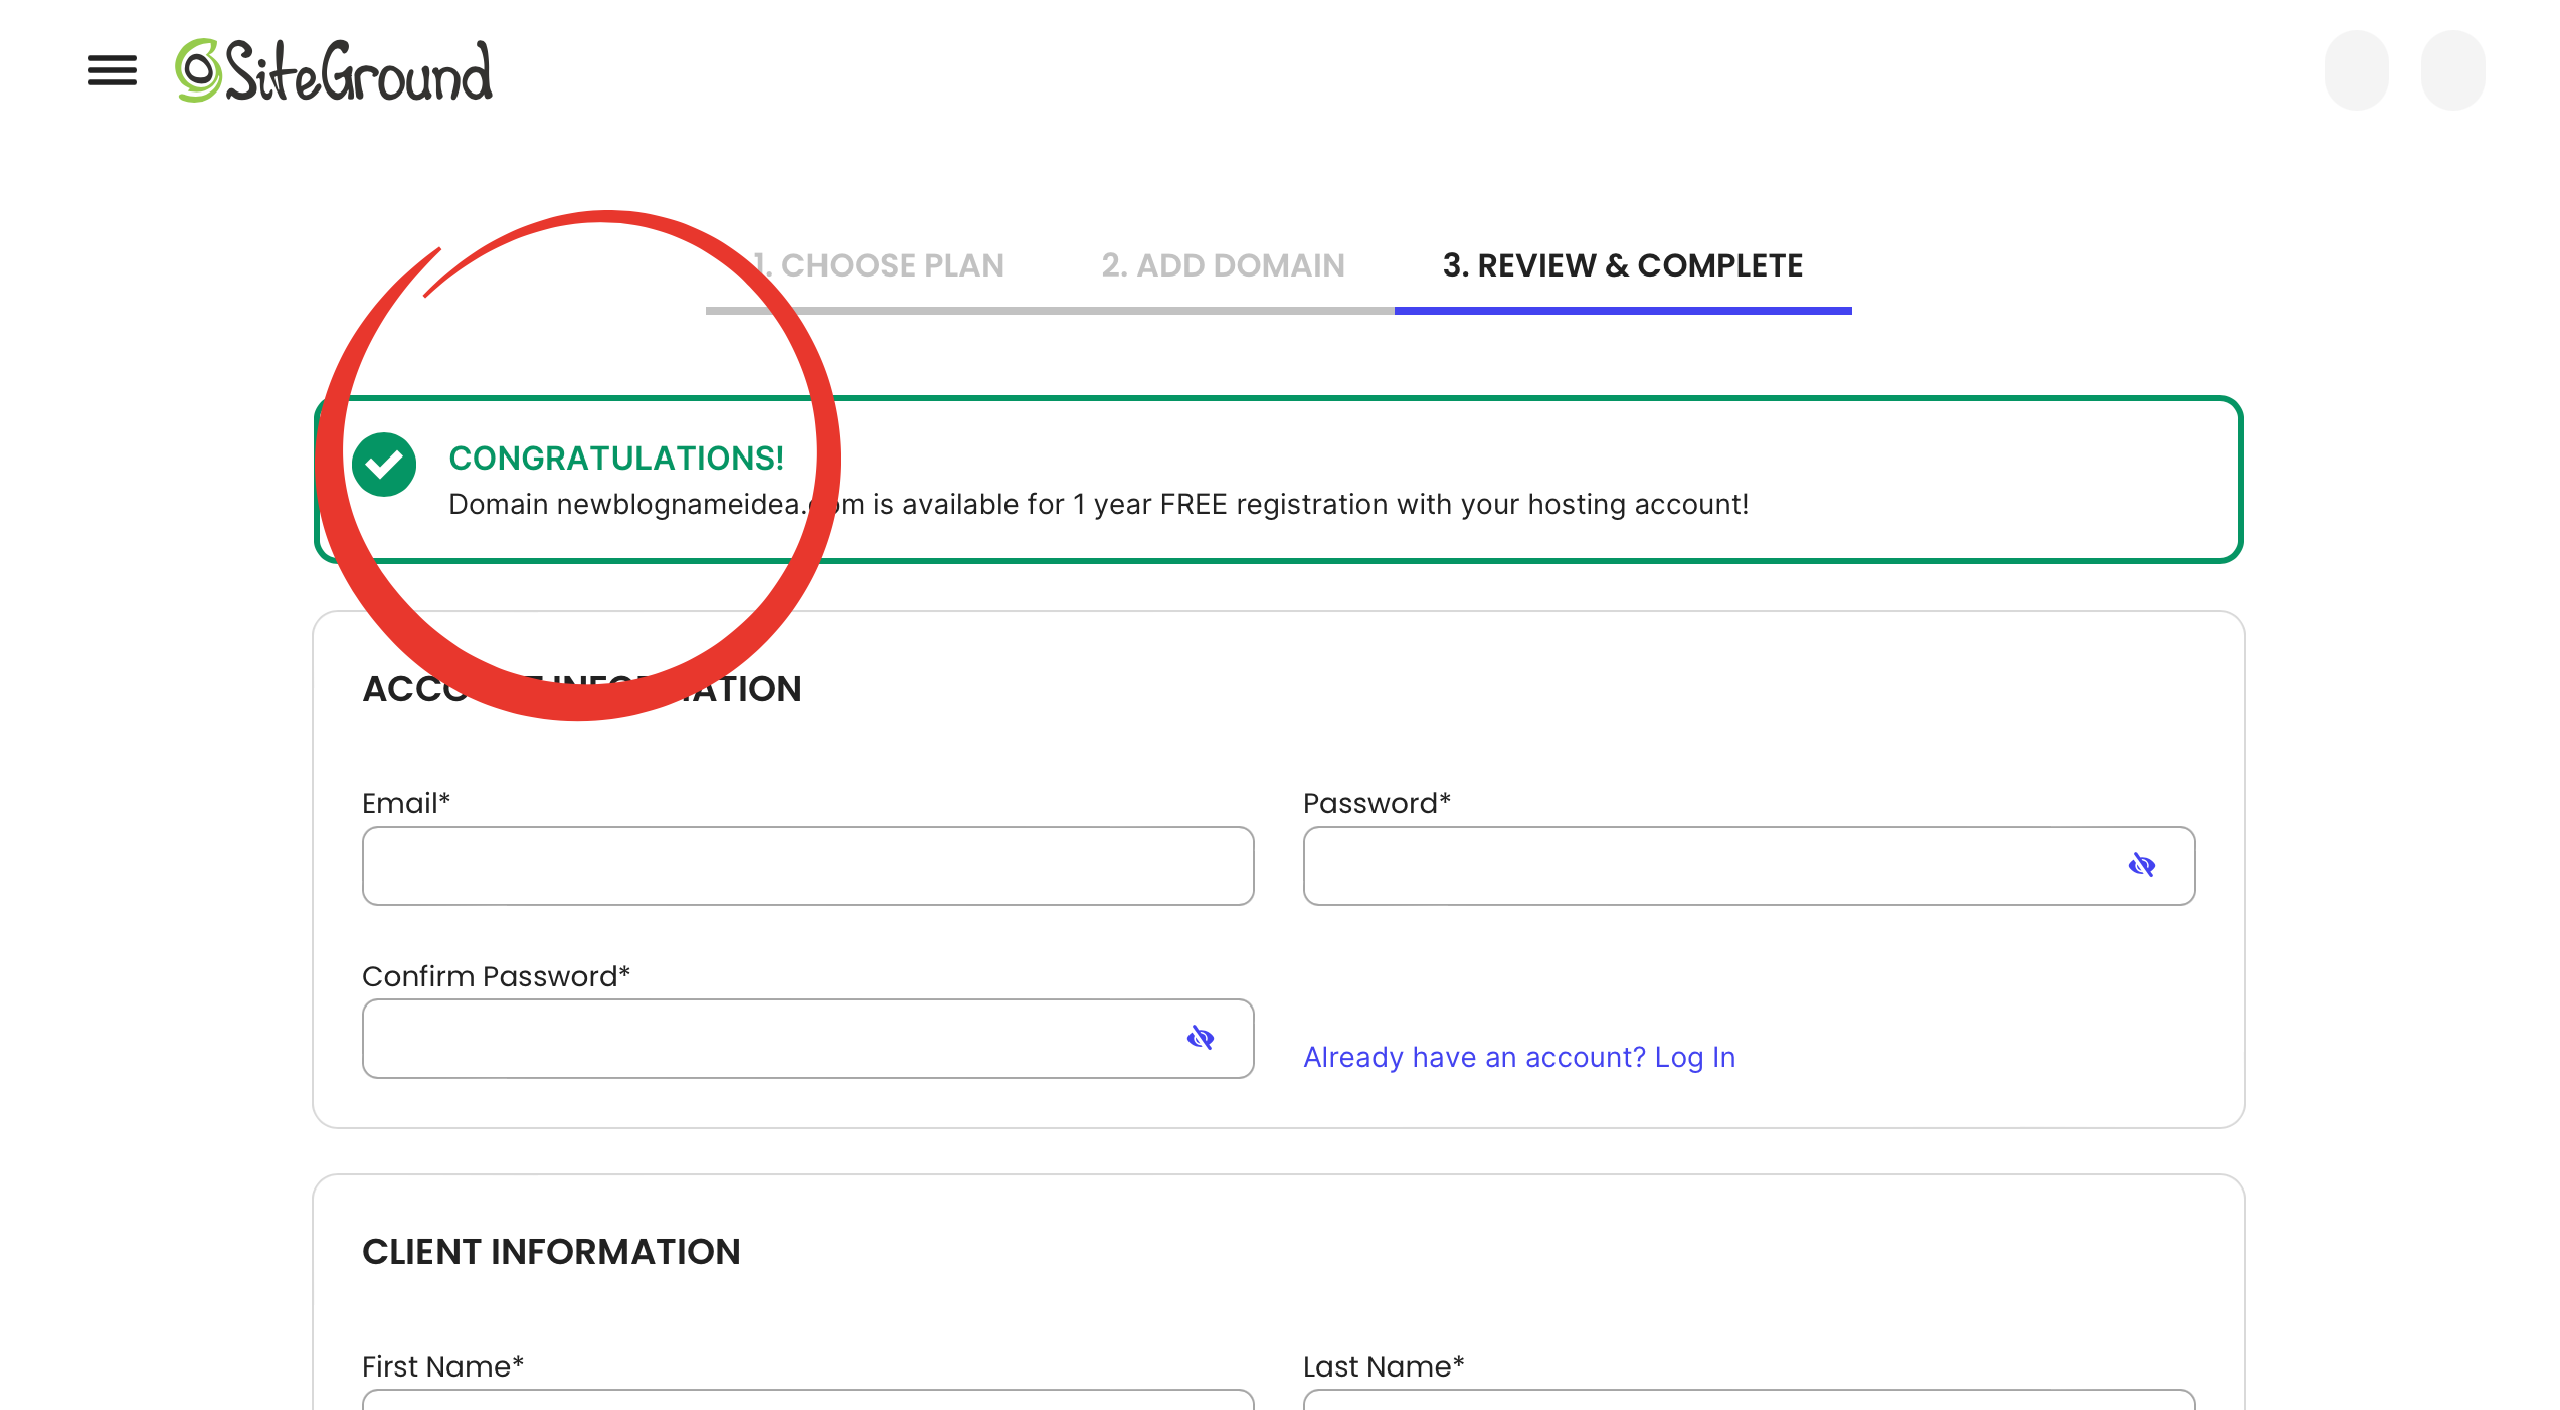
7. When you hit the field that says “Congratulations” that is so exciting—that means the name you tried is available and you are almost done!
You can begin filling out all your info on this page.
Are you getting excited yet?
I’m getting excited for you!
I still remember that nervous feeling when I was first starting my blog! I was SO excited and SO nervous!
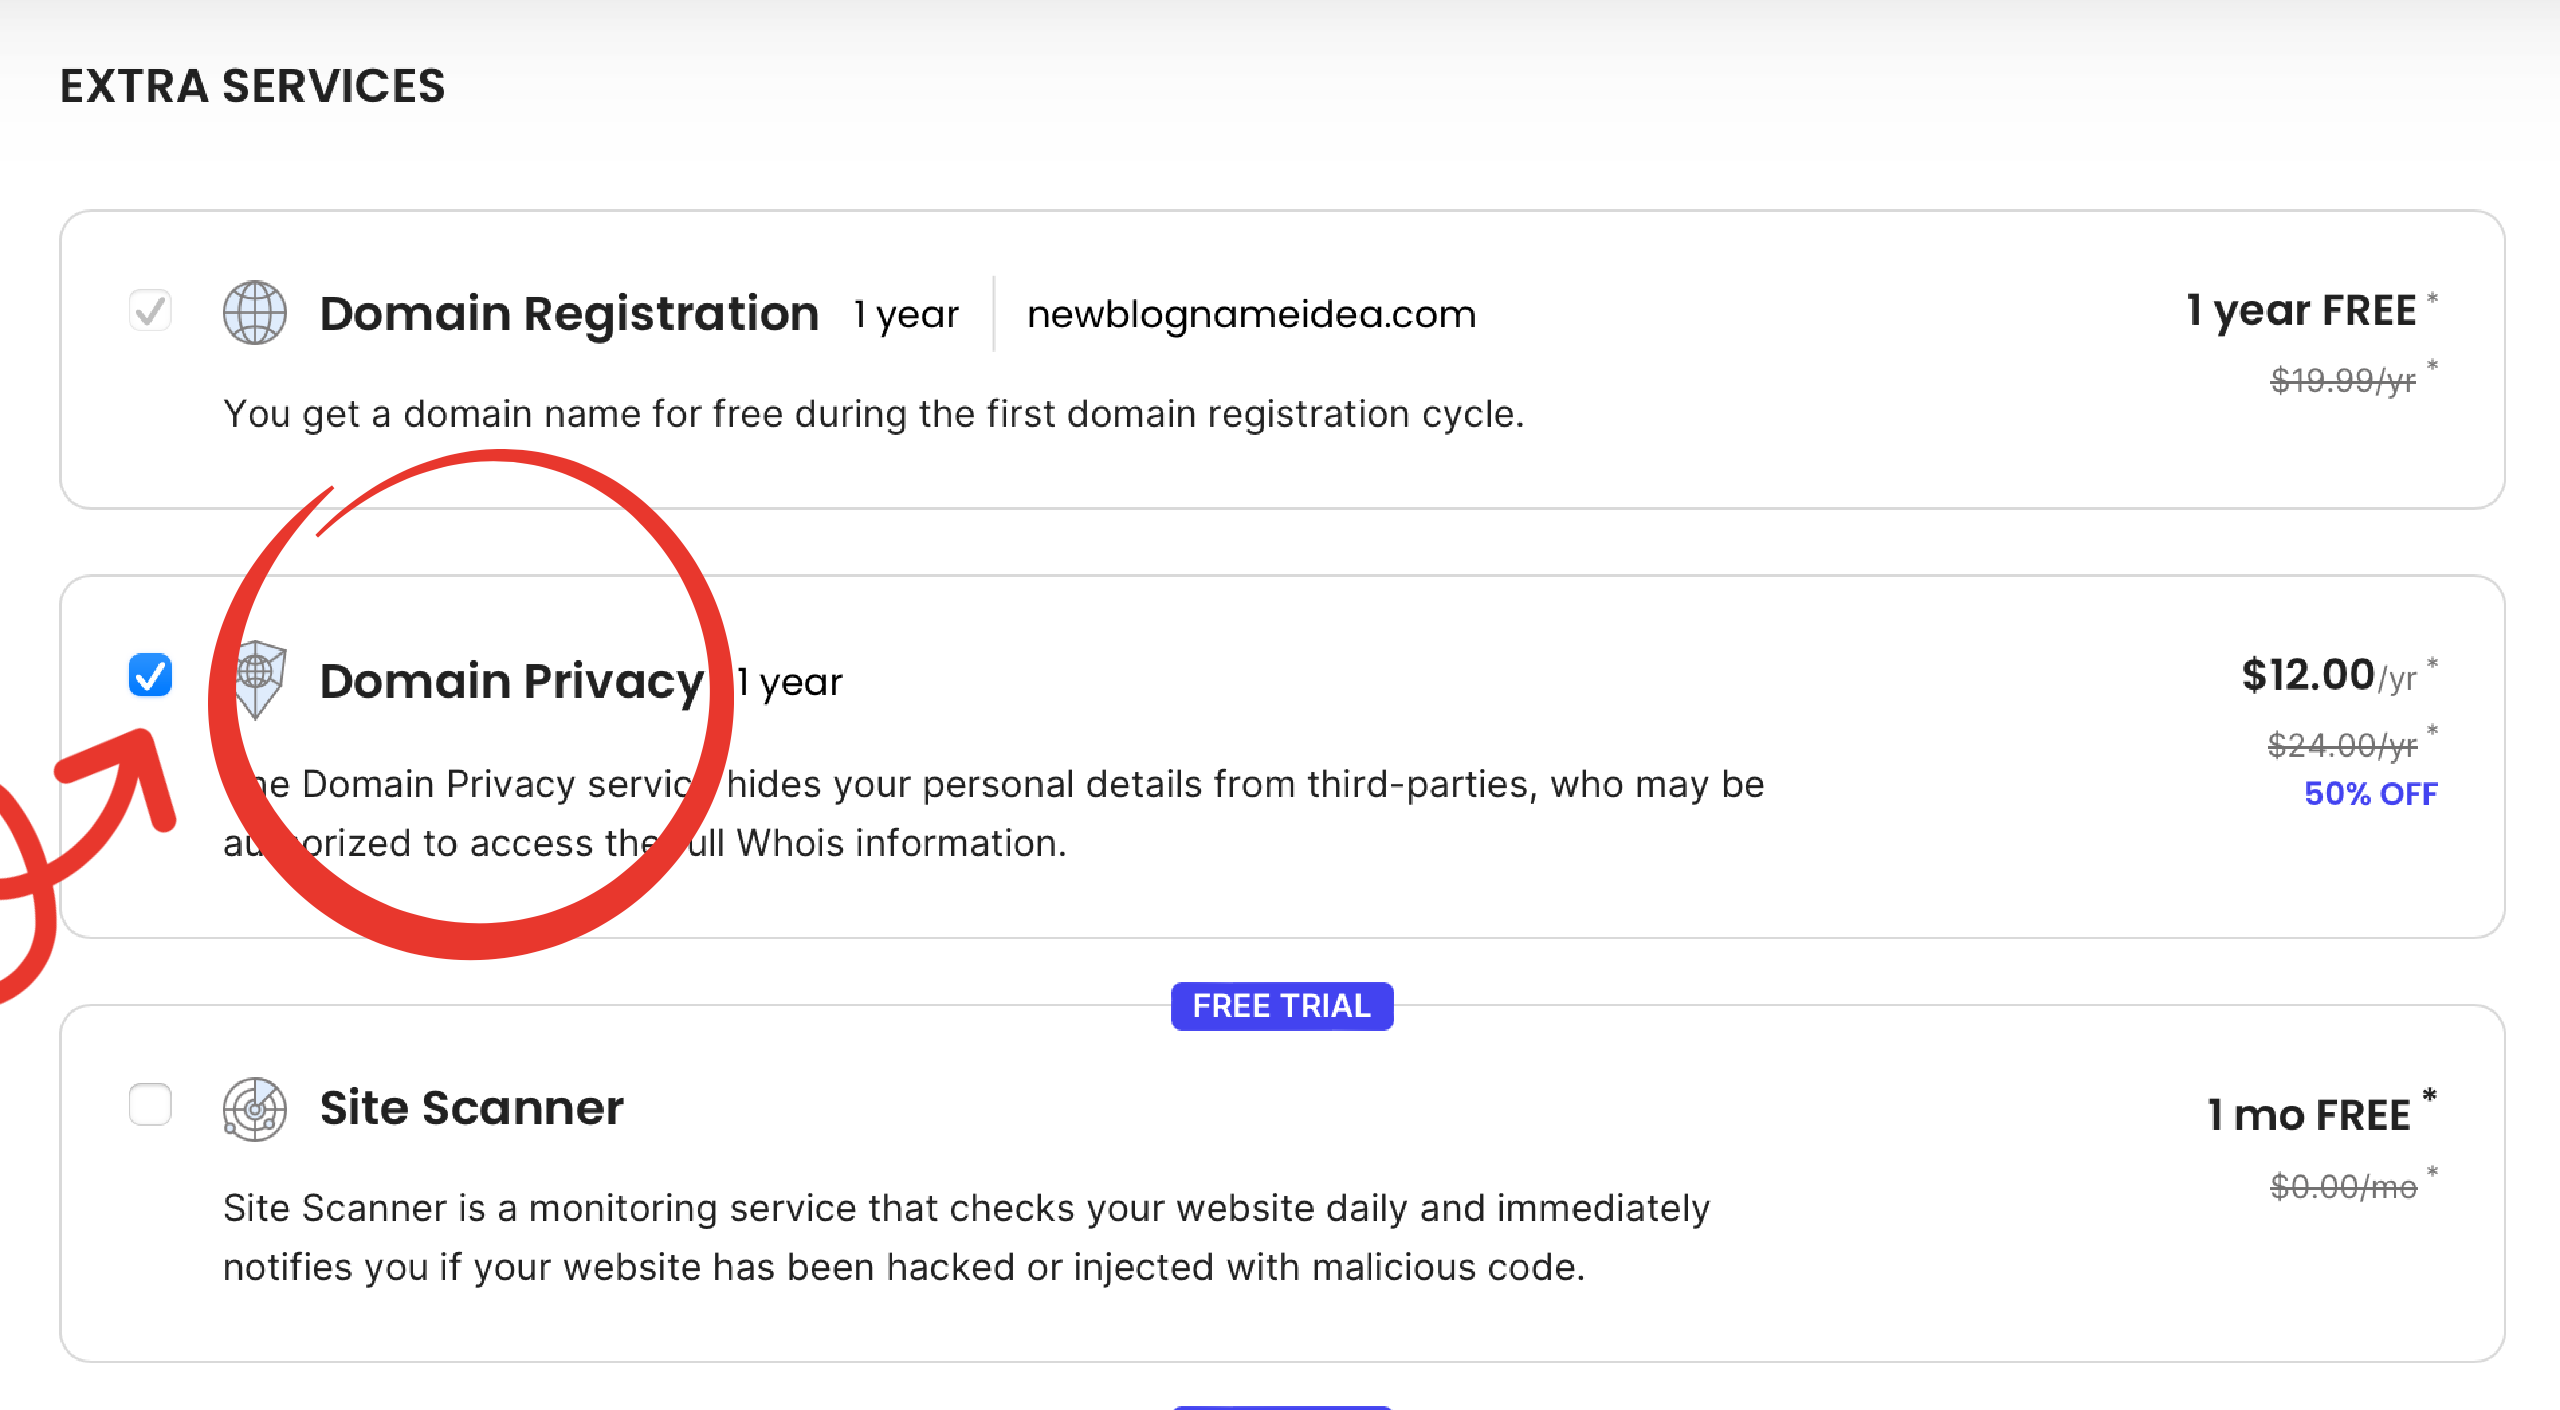
8. As you’re filling everything in, when you scroll down on that page there will be an “Extra Services” section. Domain Registration comes already checked and is free for the first year. Your domain is your website address/your blog name—you’ll want to keep that checked.
I recommend skipping all the extra charges except Domain Privacy. I would check that one to add it! It keeps your personal information (name, phone, email) safe from the entire internet world. Absolutely worth 99 cents a month.
You can always add more things later if you decide. When I started, I started with the cheapest plan, a free domain and domain privacy protection—that’s it.
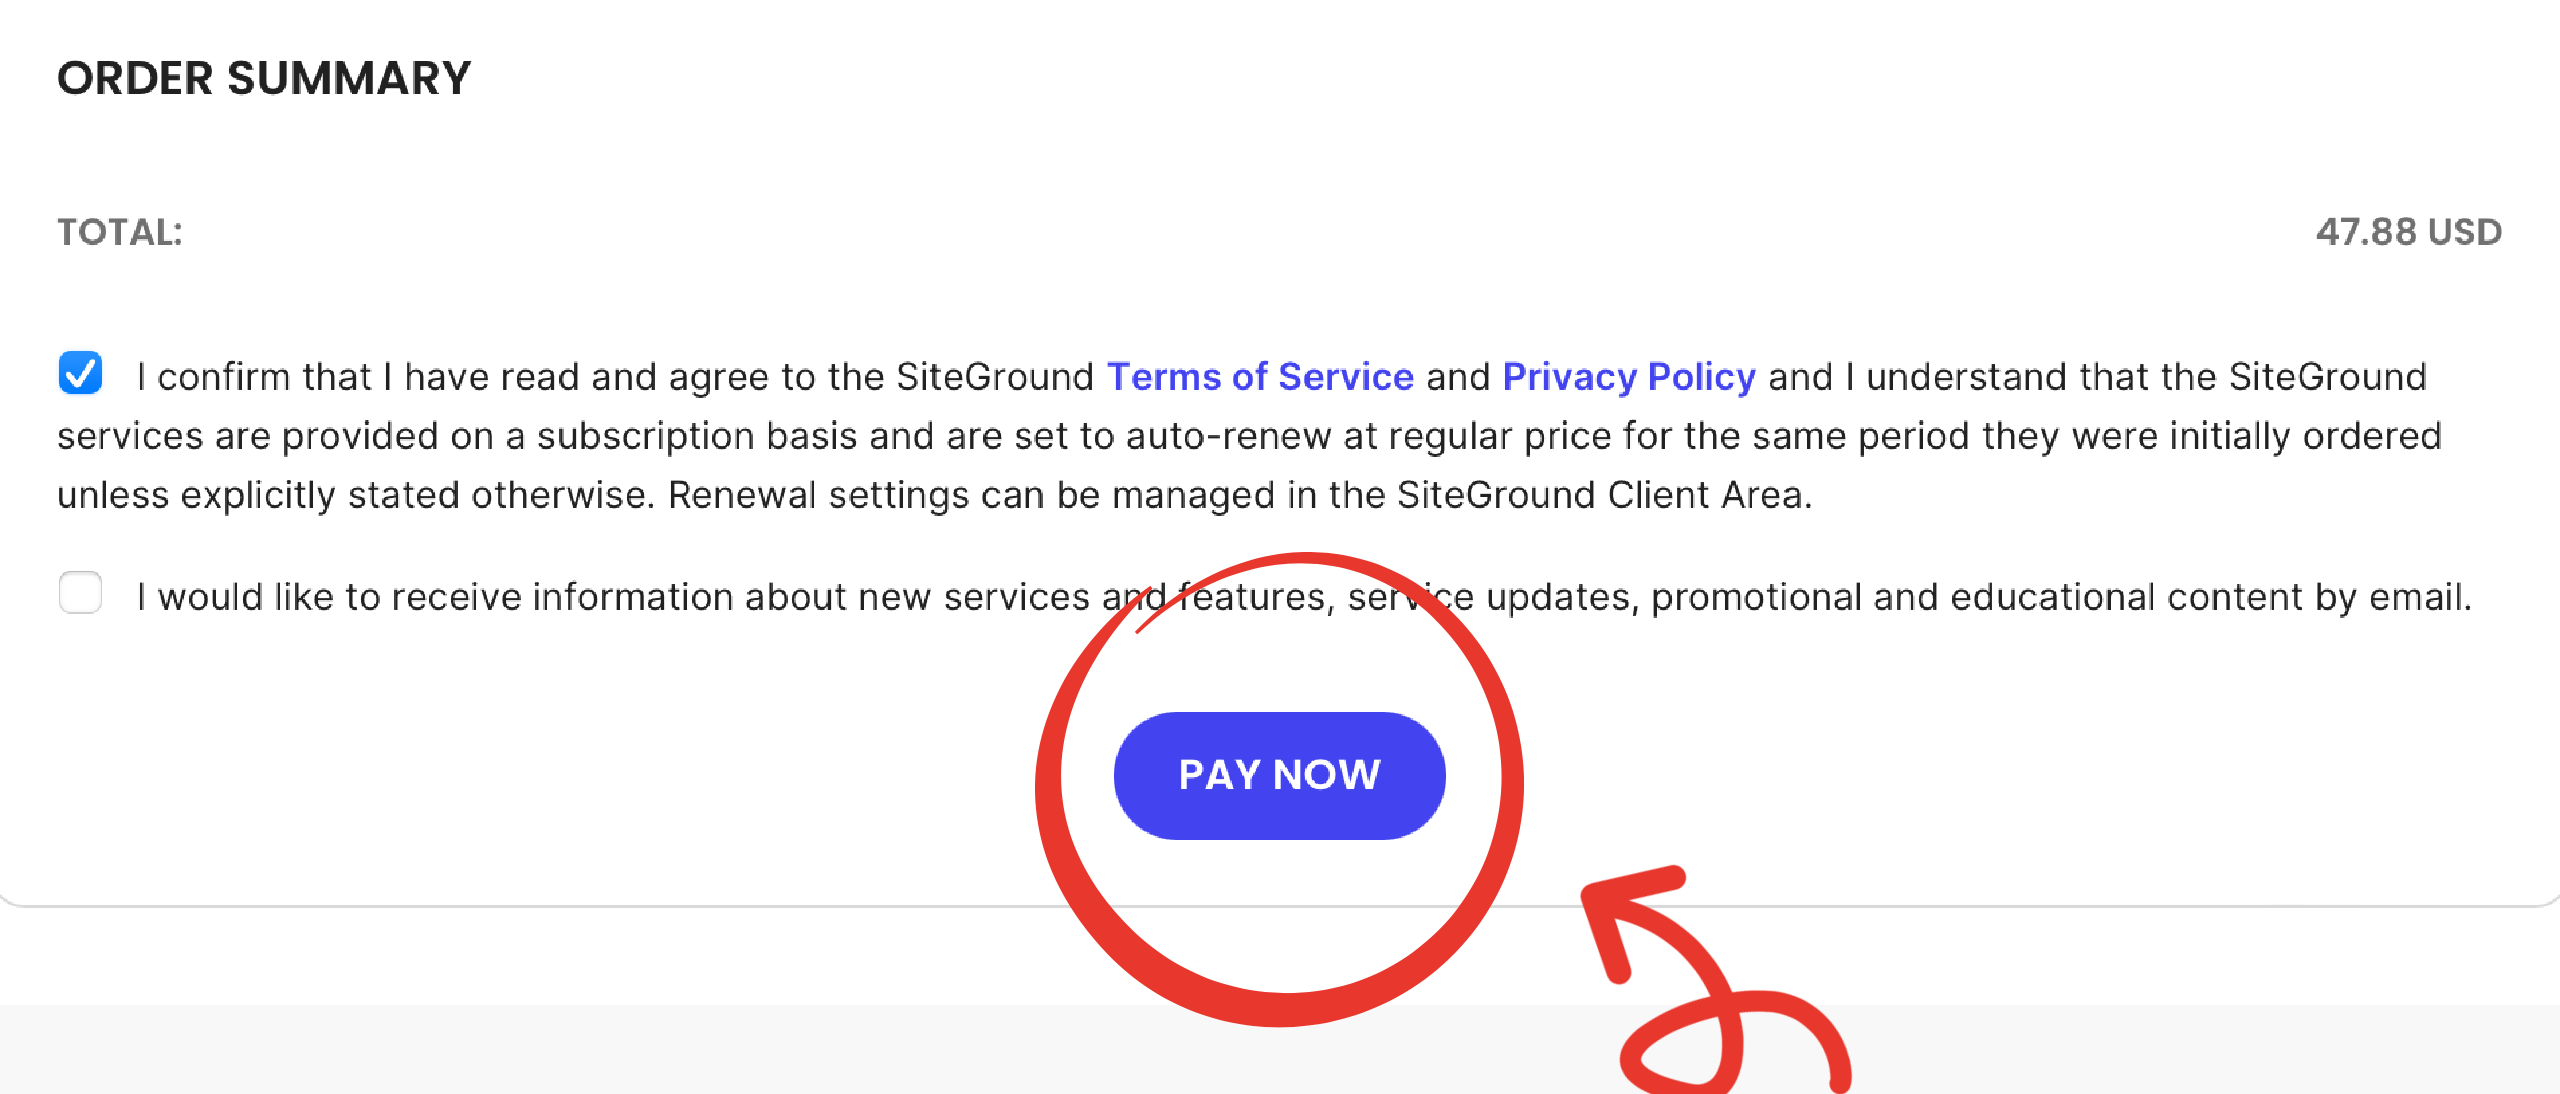
9. Once you hit “Pay Now” you’ll officially have your blog!
If I can do it, truly you can too!
Cheering for you!!
Alida
Let me know if you have any questions as you go!
Leave a Reply